This project is a great introduction to a simple method of attaching wood (joinery), and allows you to turn scrap wood into a beautiful decoration from your home or a lovely gift for someone else. The project uses joinery called dado joints. They are one of the simplest joints to make, although we all know that simple does not always equal easy (sometimes just the opposite). Dado joints just need some simple measuring and a few cuts, add a bit o’ glue, and boom. A strong and attractive joint used very often in bookshelves, cabinets, and more.
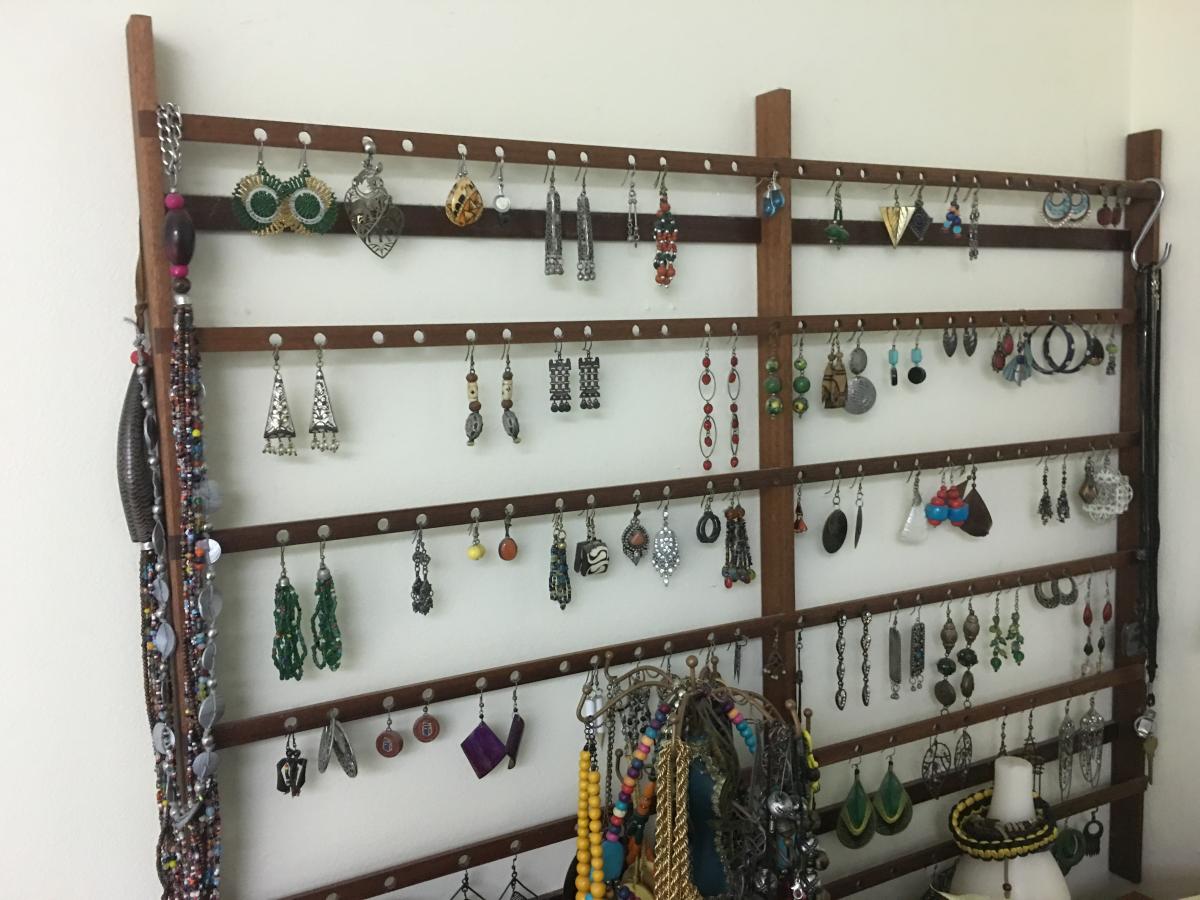
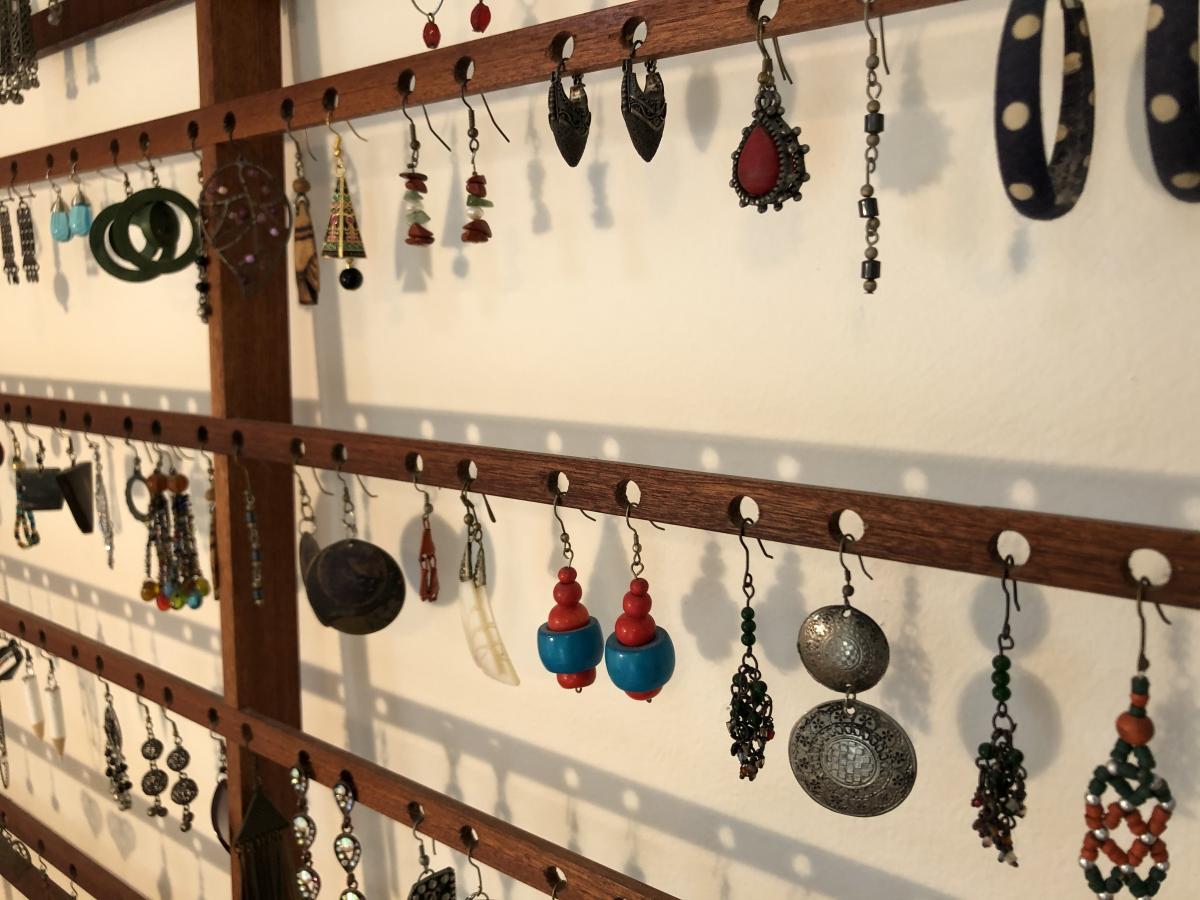
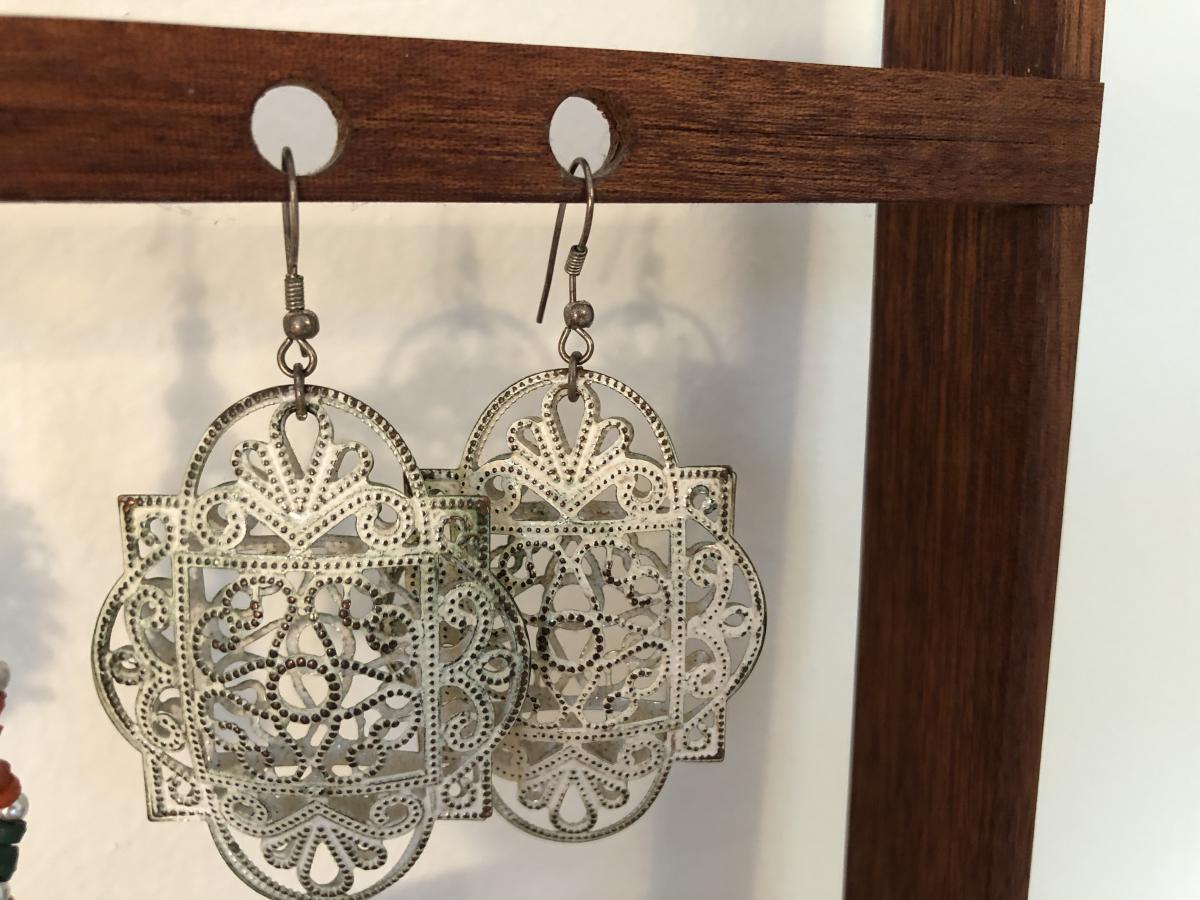
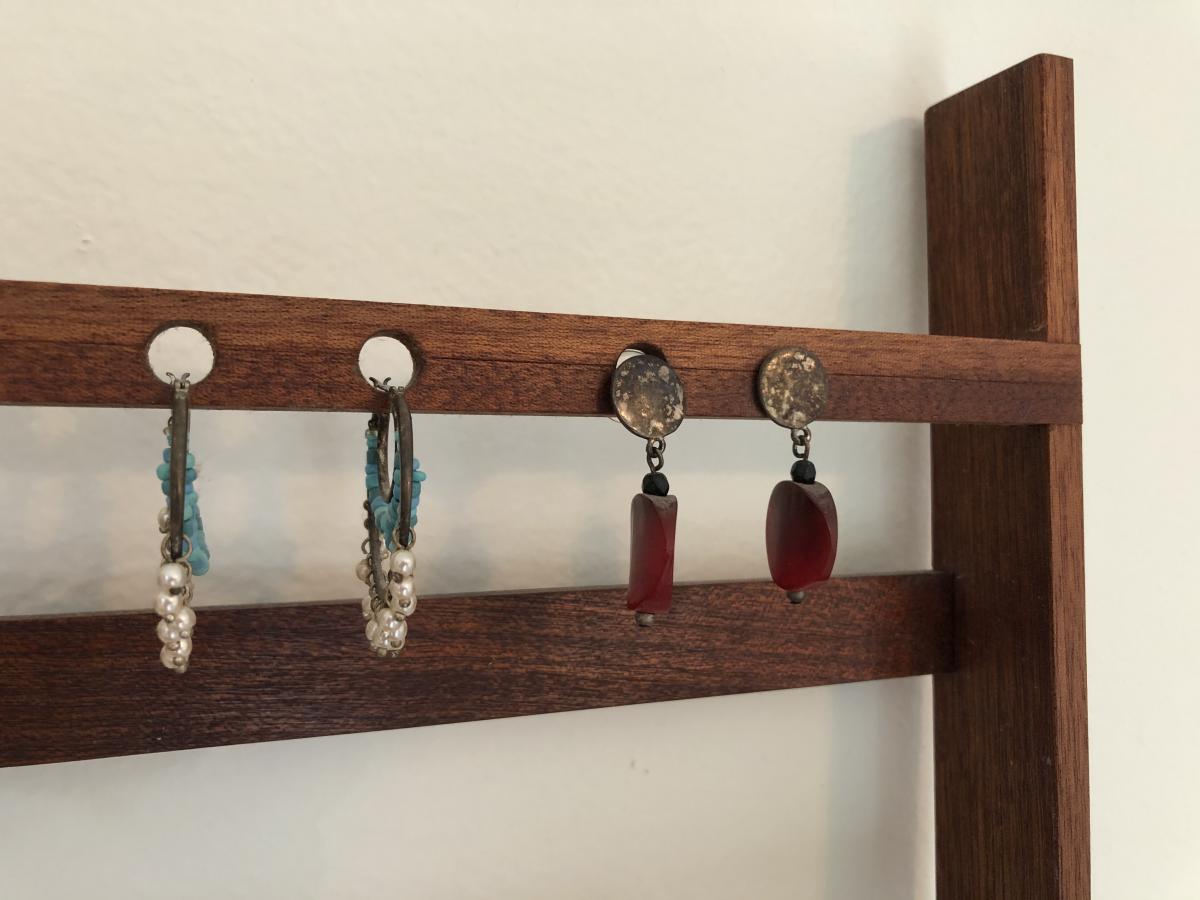
This holder is made up of 3 vertical pieces, 6 horizontal pieces attached to the front with holes to hold the earrings, and 2 horizontal pieces attached to the back which allow the piece to be screwed into the wall or attached in another way if desired, and give it a bit more sturdiness. That’s it!
Thin horizontal pieces with holes drilled to hold the earrings, sitting in the dado of the center horizontal piece.
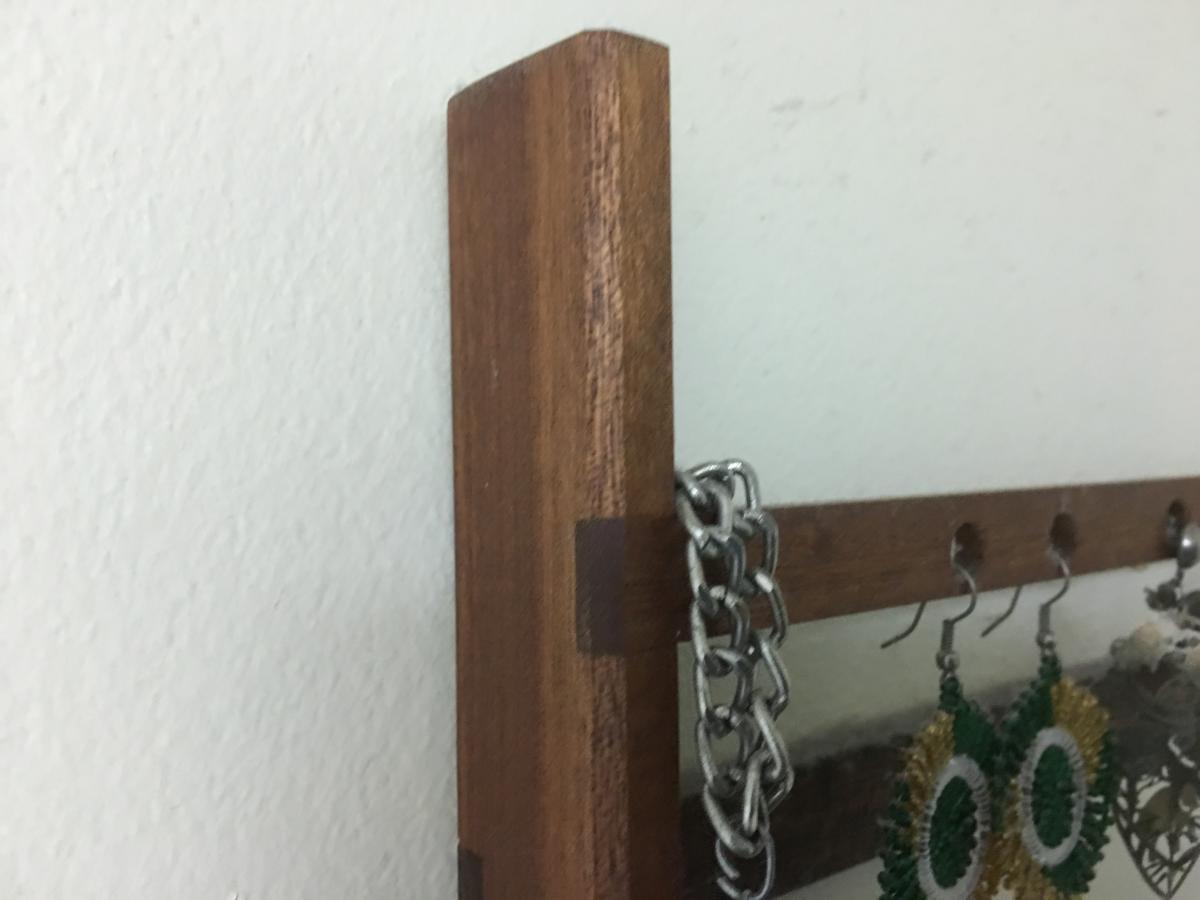
What holds this piece together is the dado joint, which can be made in a number of different ways. At its core, to make a dado joint you simply cut a flat-bottomed groove in one piece of wood so that another piece can fit across it and sit in the groove, usually flush to the first piece.
A dado joint allows one piece to sit flush within a groove cut into the other, whether in the middle…
...Or at the end of the piece.
A dado joint can be made in a number of different ways - so you can choose a way you are already comfortable with or take this opportunity to try something new! You can use hand tools or power tools to cut your grooves, including the following:
Power tools:
Table saw with a dado blade. Yup, just like the joint. Dado.
A router with a straight cut bit.
This project was for my partner, and I made it with a few thin scrap pieces of Sapele wood that was lying around (keep those scraps!!) I used dado joints to put it together, and standard wood glue to join it. I used a table saw to make the joints, as my hand saw skills at the time were not quite up to par for joinery like this.
Here is a quick overview of the process I used to make this piece:
I decided how large I wanted the earring holder to be, and made sure I had the scrap to do it. I also snuck some measurements of the earrings that it would hold (the piece was a surprise) to ensure they would fit well on the piece - lots of earrings but not too cluttered.
I actually spaced out some of the holes differently to accommodate larger and smaller earrings. Always good to use real life context as possible when measuring and designing!
I measured out where I wanted the 3 vertical and 6 horizontal pieces to lie, and marked out the dado cuts I needed to make on the vertical pieces. For dado cuts you can do this by laying one horizontal piece over the vertical and simply marking the sides off that, and then the same for the depth.
Here are the three components - the right side vertical piece, the front piece holding the earrings, and the rear piece for stability and attaching to the wall.
Since the cuts on the vertical pieces had to be the same width and depth, I taped them together and cut them as one on the table saw, ensuring I removed the same exact amount from each. This helped me avoid making mistakes in measuring or cutting, and made the joints fit together snugly.
Once I had all the joints cut, I put the piece together for a dry fit - assembled it without glue to make sure everything was cut correctly and that the joints fit. Usually you want a nice snug fit for this joint. For the most part it worked well, with a few tweaks and some cleaning up with a chisel.
With it assembled I measured out the holes for the earrings, trying to figure out what spacing would look best. I suck at design, so I looked online for inspiration and asked a friend or two. Undoubtedly I over thought this part, as I am prone to do.
I disassembled the piece and drilled the holes using a power drill. Thankfully I took my time and didn’t split any of the wood.
I checked everything one last time, put glue on the joint areas, and put the thing together. Since the wood was thin and the overall piece is pretty light, I chose to use blue painter’s tape to clamp it together while the glue dried overnight, instead of actual clamps. As long as you make sure the fit is snug and the tape is tight it works wonders on smaller projects like this.
The next day I removed the tape, carefully scraped off all the now-hardened squeezed out glue I missed wiping off the night before, and gave it a bit of sanding, up to 220 grit. While I was sanding I noticed that I didn’t really like the look of the squared edges as much as I thought I did, so I gave the piece small chamfers - usually a 45 degree angle bevel instead of the sharp corners of a square piece of wood. A nice chamfer is standard with most furniture and related woodworking, and it looked great here. I actually gave a larger chamfer than planned on the outside of the vertical pieces, which also included the end grain of the horizontal pieces in the joint, which I think is quite classy.
I didn’t actually put a finish on this piece, as I felt it didn’t need one given the beauty of the Sapele and the fact that it wouldn’t be handled much.


 Joel's Blog
 Built-It Blog
 Video Roundup
 Classes & Events
 Work Magazine